How to Digitally Organize Years of Photos
Up until recently, I was one of those people that had thousands of unorganized photos on my phone’s camera roll. It was only when I almost lost 4,000 of my precious iPhone photos (you can read more about that horrible situation here), that I decided I needed a system in place to save and organize my pictures. Now, not only do I have all of my photos organized by year (and further by countless, obsessively labeled sub-folders), but I also have an easy, low-maintenance system in place to ensure all my future photos are organized and stored neatly (and securely!) almost as soon as I take them. If you are looking for someone or something to give you that little push you need to back up and organize your photos, consider this your nudge! Take it from me, you won’t realize how important it is to save all your photos until you don’t have any photos to save. To get started, here are a few ideas of how you can digitally organize years of photos.

(Note: if you want to know how to organize years of printed photos, I have saved a bunch of helpful resources here.)
Get ALL your photos in one spot.
Whether you want to use iCloud, Dropbox, Google Drive, Google Photos, a USB, an external hard drive, or another cloud/physical storge space, pick one that has enough room for all of your photos (with room for future snaps too!). Once you’ve picked a spot, put all your photos (you know, the random ones on your iPad, the folder with pictures that you put in a Dropbox to share with a friend, the ones all your friends and family saved on a shared Google Drive folder after that one event. . . ALL of them!) in one, massive photo dump folder there so that everything is backed up in one place.
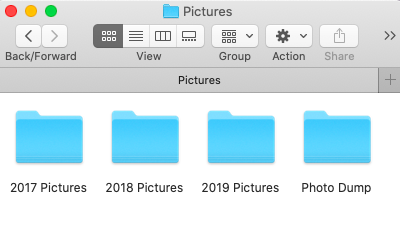
If you are thinking, “one massive dump into one single folder? That’s not organized at all, Giulia!” then you are correct. The purpose of this solitary folder is to act as a place to corral all the pictures that have yet to be sorted. When you finally get around to going through and organizing everything in this folder, it will be easier to drag and drop them into their appropriate home and know what you have left to go through. All other folders (we will get to those in a second!) will be the homes of all your organized photos.
Still with me? Great.

Make sure you have a backup.
Now, before we get to the organizing part (you are just as excited as I am, right?! 😜 ), copy that same singular photo dump folder and save it in a second location. As you work on and add to your photo collection, you can use this second spot to back up all of your work.
You might not think you need a backup of your backup (“Giulia, now you’re just being paranoid.”), but hear me out. If you go through and sort all of your photos in ONE place, don’t you want to have a second place with all of your hard, picture-sorting work saved just in case? Don’t forget, while you may have all the same photos saved on your phone’s camera roll, you only have one location with all your time-consuming, organizing work!
I personally recommend saving everything on one cloud-based location and one physical location so that you are covered if either of those locations gets compromised. Imagine you saved your photos on two different USBs and kept them both in the same drawer in your desk. How horrible would it be if one day you spilled your coffee while the drawer was open and both your original and your backup USB stopped working?! Again, you won’t know the importance of a backup until there’s nothing to backup.
Start a system for all future photos.
A big reason why it took me so long to start backing up my pictures was because I knew how tedious and time consuming it would be go to through and organize all of them. What I didn’t realize is that my photos don’t have to be organized in order to be saved (see, now the photo dump folder is starting to make sense!).
That said, for all future photos that you take (and save!), use a system to organize them. While it might be tempting to just continue to dump all of your photos into one file, if you start an organization system today, then you won’t continually be adding to the pile of photos you need to go through.
For any iPhone users who may be considering using the “albums” feature in Photos, I have found that using this system gets hard to maintain and track. While your photos will be saved in albums, it’s difficult to see which items on your camera roll are saved to an album and which ones are not. I have also found that this system is difficult (if not impossible) to copy over to other locations. If you sort your photos in folders instead, your entire system will be easily translatable across all the photo saving platforms I listed above.
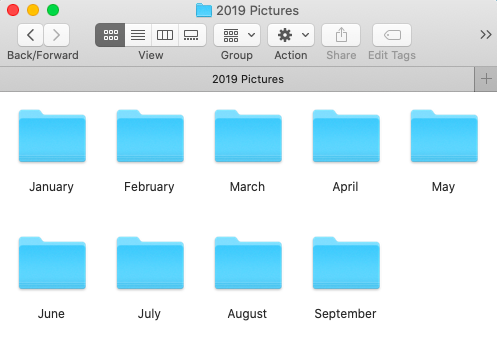
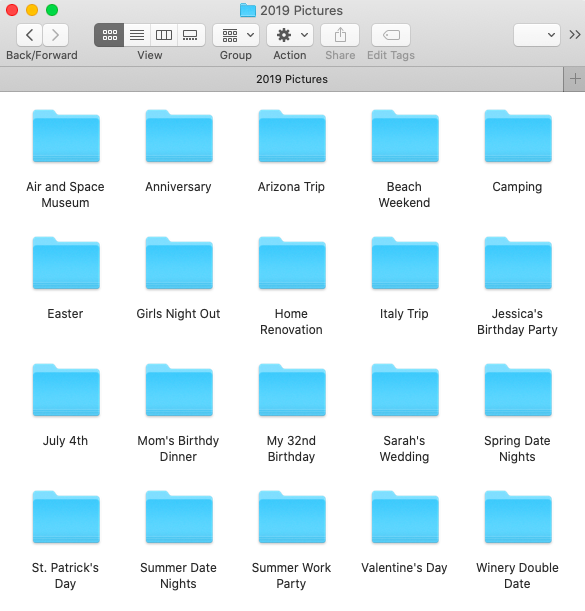
There are lots of ways you can organize your photos, and you should choose whichever one works best for you. Some of my favorite ways to sort pictures are by month,

or by event/activity.

If you use a system like this and back up your photos once a month, you can either dump them into their respective “month” folder, or create event/activity folders from the past month and save them appropriately there. Either way, it shouldn’t take more than 5-10 minutes each time!
Organize the photo dump folder gradually, whenever you have time.
While you are maintaining your new organization system (that is, saving any new pictures you take in their respective folders), try to check on the big photo dump folder and organize everything in there the same way over time. It might seem like a huge task (because it definitely is if you are trying to tackle all the photos in one go), but just take it one small chunk at a time. A good idea would be to make it a routine to go through 50 photos in your photo dump folder every time you back up the photos on your phone. As long as you are coming back to that folder and organizing it a little at a time, eventually, all your pictures will be organized.
If you just now are starting to sort through and organize all of your pictures, I hope that this gave you some helpful tips and ideas!
Happy photo saving!
Giulia ♥
Twitter | Instagram | YouTube | Tumblr | Pinterest


